Dust lightly with a puff after your shower — this DIY body powder leaves skin soft, fresh, and beautifully scented. There’s something wonderfully timeless about a soft puff of perfumed body powder . It’s more subtle than perfume, keeps skin silky, and carries a personal, intimate scent that lingers close to you. Best of all, you don’t need talc or complicated ingredients — you can make a talc-free body powder at home in minutes. In this guide, you’ll get: A from-scratch body dusting powder recipe (completely homemade) A baby powder upgrade recipe (transform a base you already have) 15+ scent blends you will love (from floral to cozy to citrus fresh) Pro tips on how to use, why to use, and how to make it silky and safe Why Use Perfuming Body Powder? Many people ask why bother with DIY perfumed body powder when sprays and perfumes exist. Here’s why: Soft, intimate fragrance : a veil of scent that stays close to skin Absorbs light moisture : perfect for...
Get link
Facebook
X
Pinterest
Email
Other Apps
Haute couture choker with beaded roses (pattern) / szydełkowa obróżka z koralikami (wzór)
Get link
Facebook
X
Pinterest
Email
Other Apps
Chokers are now very fashionable ( jupi ) that's why thay had to appear on my blog.
I gave few inspirations on chokers in my last post, you must admit they all look lovely but I wanted my first choker here to be more haute couture.
That's why I created this choker as a combination of my love to crocheting and roses.
Chokery są obecnie super modne dlatego też nie może ich zabraknąć na moim blogu.
W poprzednim wpisie przedstawiłam kilka świetnych inspiracji, z czasem coś na ich kształt pewnie też się pojawi tutaj, ale chciałam aby mój pierwszy choker na blogu był wyjątkowy.
Biżuteria ta jest wynikiem mojej miłości do szydełkowania i róż &(^-^)&
Inspiration:
Inspiracja:
Róże to moje najukochańsze kwiaty, zresztą łatwo to zauważyć choćby poprzez ilość postów , które im poświęciłam:
Roses are my favourite flowers, It's easy to see as I made many posts about them :
Są one źródłem niezanikającej inspiracji dla mnie.
I love all in them smell, look even thornes. They are always my biggest inspiration if it comes to jewelry.
Materials and tools :
koraliki / beads
nożyczki / scissors
igła / needle
włóczka / yarn
szydełko 2.3 mm / crochet hook 2.3 mm
szczypce płaskie / flat nose pliers
zapięcie / metal clasp
metalowe kółeczka / metal jump rings x 2
końcówka do naszyjnika / ribbon clamps
łańcuszek / chain
When you will choosing colors of yarn and beads remember that some colors match better to each other than others. Some colors are analogous some complementary, you can also make monochromatic choker, it may look fabulous!
It will be nice to choose right colors of metal clasps, for example choose gold clasps if you have warm colors of yarn and beads.
Of course you can be rebel ! :-)
Kolory , które ja wybrałam do chokera to tylko inspiracja możesz wybrać zupełnie inne, ale warto pamiętać , że niektóre kolory są komplementarne inne zaś analogiczne, zdecydowanie ciekawym sposobem może być zrobienie chokera w kolorach monochromatycznych. Myślę , że w przyszłości sama się o taki pokuszę. Warto tez zwrócić uwagę na to, aby dobrać kolor metalu do wybranych odcieni włóczki to znaczy złoty łańcuszek do ciepłych odcieni włóczki.
Oczywiści to tylko propozycje możesz być buntownikiem i złamać wszystkie zasady.
Jak to zrobisz to koniecznie prześlij zdjęcie uwielbiam buntowników w sztuce :-)
wzór obróżki na szydełku
Choker
using crochet hook make 11,8 inches of choker
see diagram
crochet symbols I used on diagram:
o - chain
x- single crochet
wzór różyczek do szydełka
Wykonaj 30 cm pasku chokera według schematu
tłumaczenie symboli:
o - oczko
x - półsłupek
. - oczko zamknięte
RosesRóżyczki:
I made 7 roses but you can make more or less, all depends of your style
see diagram
on photo below is explanation of symbols I used in this diagram
Wyszydełkuj różyczki według schematu, na dole podaje tłumaczenie symboli:
Ribbon clampsZamknięcie
On photo above is little tutorial how to attach ribbon clamps to a choker.
It's very easy but you must use quite big strength if you want it to be permanently.
Na zdjęciu powyżej pokazuje jak wykonać zamkniecie do naszyjnika.
Jest to super proste , ale należy użyć dość dużej siły , aby zamknięcie było trwałe.
Sewing
Szycie
Sew on roses to choker, remember to use thread which will have same color as roses .
Przyszywamy różyczki do paska. Jeśli masz możliwość użyj tego samego koloru nici co kolor róż.
Beading
Koraliki
Now only sew on beads.
Wszyj koraliki według uznania.
Voila ! the choker is ready
It looks beautiful and is very comfortable.
Gotowy naszyjnik ! Jest śliczny, w rzeczywistości prezentuje się o niebo lepiej niż na zdjęciach , prawdopodobnie pochmurna pogoda nie sprzyja zdjęciom. Choker jest też niesamowicie wygodny.
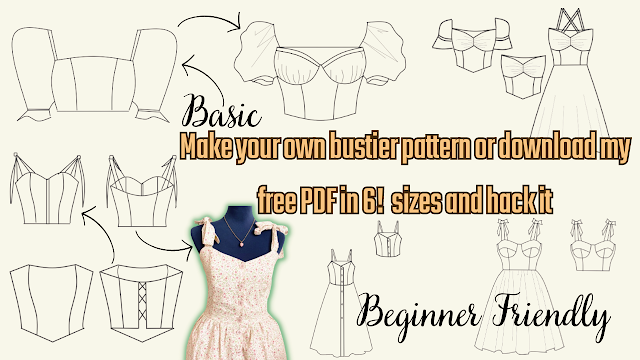
Are you ready to create your own bustier pattern? Look no further, because I've got you covered! In this tutorial, I will show you how to create your own basic bustier pattern or download my free printable PDF pattern in 6 sizes and hack it into 8 different styles, including a bustier with cups, milkmaid top, bustier with sleeves or without sleeves, bustier dress, and more. This tutorial is perfect for beginners, and I will guide you step-by-step on how to resize the pattern and add perfect sleeves. With this video, you can easily create your own custom-made bustier that fits you perfectly! But wait, there's more! Not only will you get access to my free PDF pattern, but you can also share it with your sewing friends. It's easy to download and print, and you can start creating your own bustier right away. So, don't hesitate to watch the whole video and start creating your own unique bustier pattern. And if you like this video, please give it a thumbs up and subscribe to ...
Looking for a quick and easy sewing project that's perfect for beginners? Look no further than my latest tutorial on how to sew a bralette top! This bralette top is made using fabric scraps, so it's not only budget-friendly, but also sustainable. Plus, I'm giving away a free printable PDF pattern that comes in all sizes, so you can easily make this top for yourself or as a gift for a friend. In my next post, I'll be sharing a video tutorial on how to use my free sewing PDF pattern, including how to resize it, hack it, and get creative with different variations. So make sure to subscribe to my channel and stay tuned for that! But for now, let's focus on making this super easy bralette top. My step-by-step tutorial includes detailed instructions and photos to guide you through every step of the process. And if you get stuck, don't worry - I'm always here to answer any questions you may have. So what are you waiting for? Download the free printable PDF patter...
Sewing a Backless Halter Top: An Easy and Eco-Friendly DIY Project Summer is around the corner, and what better way to prepare for the warm weather than by sewing your own backless halter top? This DIY project is perfect for beginners, as it's easy to make and requires only a few fabric scraps. In this tutorial, you will learn how to sew a stylish and comfortable backless halter top using your own measurements and a free printable PDF pattern. The pattern is designed to be adjustable, so you can customize it to your exact size. The best part of this project is that it's not only fun and easy, but it's also eco-friendly. You can use fabric scraps or old clothes that you no longer wear, and turn them into a beautiful and functional piece of clothing. To get started, you will need the following supplies: Fabric scraps or old clothes Ruler Scissors Sewing machine Pins Free printable PDF pattern (downloadable from the blog post) Step-by-Step Tutorial: Download and print the PDF ...
.heif)


.png)
.png)
Ale cudeńko Ci wyszło :)
ReplyDeletedzięki :-)
DeletePomysł rewelacyjny i wykonanie również :)
ReplyDeletedziękuje :-)
Deleteśliczny naszyjnik!
ReplyDeletedziękuje!
Delete
ReplyDeleteWhat work and thoroughness. Very pretty
thank you!
Delete