Posts

Showing posts with the label buttons

Homemade Perfumed Body Powder: Talc-Free DIY Perfume

Image
  Dust lightly with a puff after your shower — this DIY body powder leaves skin soft, fresh, and beautifully scented. There’s something wonderfully timeless about a soft puff of perfumed body powder . It’s more subtle than perfume, keeps skin silky, and carries a personal, intimate scent that lingers close to you. Best of all, you don’t need talc or complicated ingredients — you can make a talc-free body powder at home in minutes. In this guide, you’ll get: A from-scratch body dusting powder recipe (completely homemade)  A baby powder upgrade recipe (transform a base you already have) 15+ scent blends  you will love (from floral to cozy to citrus fresh)  Pro tips on how to use, why to use, and how to make it silky and safe Why Use Perfuming Body Powder? Many people ask why bother with DIY perfumed body powder when sprays and perfumes exist. Here’s why: Soft, intimate fragrance : a veil of scent that stays close to skin Absorbs light moisture : perfect for...

how to install metal button snaps

Image
    Hello👋😀, in this DIY step by step video I show you how to install metal buttons . I show you step by step extreme easy and quick tutorial on how to add snap fasteners to every bustier , dress, top , coat and so on . In my video I'm adding metal buttons to bustier top and if you like to sew same bustier check out those links :   how to make pattern for bustier CLICK      how to sew bustier CLICK    See for yourself how super easy it is to create new fall style clothing . I hope this video is easy to follow and you have fun watching it ❗ Let's create something beautiful ❗ How to install snap buttons on fabric Step by step video on install metal buttons       how to add metal snap buttons  step by step button snap adding to fabric  instal metal snaps   

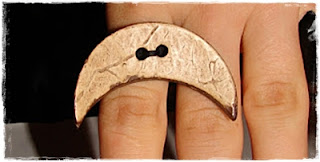
DIY Tutorial / coco shell button ring / pierścionki / pierścionek krok po kroku

Image
Nieskończona ilość pomysłów na wykorzystanie guzików , można stworzyć z  nich wiele dodatków i ozdobić praktycznie wszystko  , a dziś przerobię je na pierścionki  A potrzebujemy gumka elastyczna igła nić guzik koraliki (opcjonalnie) Pierścionek tutorial krok po kroku  elastyczną gumkę wymierzamy na własnym palcu  Ucinamy kawałek lub kawałki zależy ile chcemy pierścionków zrobić  Zszywamy w pierścień Przyszywamy guzik  Pierścionek gotowy :-) i można brać nim  życie na rogi  Pierścionki razem   "krążek"

DIY...tutorial...Jak odświeżyć/ odnowić guziki?....How to refresh / renew buttons ?....DIY

Image
Jak "odnowić/odświeżyć stare guziki i nie tylko ... a wystarczy kawałek materiału ,skóry (co mamy lub chcemy użyć   ) może być nawet ze starego krawatu  ...lub tez lakier do paznokci bezbarwny lub w wybranym kolorze  Guziczki przed  ..."szare bure" ... Po... "Odnowa "przy użyciu lakieru bezbarwnego ..można też użyć lakier kolorowy (czyli wybrany kolor/kolory  )..nadaje piękny połysk  I przy użyciu kawałka materiału ... A tu materiał ze starego krawata  .... I w wersji "kolczyki-koronki"   ... shop-ek.pinger.pl/(…)28-czesc-z-serii-zrob-to-sama… Jest wiele zastosowań ja na pewno będę je przyszywać do ubrań ,tworzyć i ozdabiać biżuterię