Dust lightly with a puff after your shower — this DIY body powder leaves skin soft, fresh, and beautifully scented. There’s something wonderfully timeless about a soft puff of perfumed body powder . It’s more subtle than perfume, keeps skin silky, and carries a personal, intimate scent that lingers close to you. Best of all, you don’t need talc or complicated ingredients — you can make a talc-free body powder at home in minutes. In this guide, you’ll get: A from-scratch body dusting powder recipe (completely homemade) A baby powder upgrade recipe (transform a base you already have) 15+ scent blends you will love (from floral to cozy to citrus fresh) Pro tips on how to use, why to use, and how to make it silky and safe Why Use Perfuming Body Powder? Many people ask why bother with DIY perfumed body powder when sprays and perfumes exist. Here’s why: Soft, intimate fragrance : a veil of scent that stays close to skin Absorbs light moisture : perfect for...
Get link
Facebook
X
Pinterest
Email
Other Apps
wire wrapping woven ring / pierścionek wire wrapping
Get link
Facebook
X
Pinterest
Email
Other Apps
Miedz to cudowny materiał do tworzenia biżuterii szczególnie dla posiadaczek ciepłego odcienia skóry. Ogromnym plusem miedzi jest łatwość z jaką można na niej tworzyć prawdziwe cuda,
polecam ten materiał w szczególności początkującym jubilerom ;-).
Do stworzenia tych pierścionków użyłam tylko podstawowych narzędzi ,aby było jeszcze łatwiej .
Copper is wonderful material for jewelry especially if you have warm undertone of the skin.
It's also very easy to work with it , just perfect for beginners.
I used only basic tools so you don't need any special equipment for making this ring.
Potrzebujesz:
You need:
drut miedziany o średnicy 2.0 i 0.5 mm / copper wire 2.0 and 0.5 mm diameter
szczypce płaskie / flat -nose pliers
szczypce okrągłe / round- nose pliers
imadło opcjonalnie /vise ( optional)
Jak odmierzyć obwód palca do pierścionka?
How to measure finger circuit to the ring?
z pomocą drucika miedzianego odmierzamy obwód naszego palca -patrz foto
i na podstawie odmierzonego pomiaru odcinamy trzy kawałki drutu o grubości 2.0 mm
with the help of thin copper wire measure the the finger circuit ( see photo)
when you have the measurement cut 3 pieces of copper wire (2.0 mm diameter)
Jak zrobić pierścionek w technice wire wrapping ?
How to make a ring in wire wrapping technique?
przytrzymujemy trzy odcięte kawałki drutu w imadle lub sklejamy taśma klejąca i przystępujemy do plecenia drutem o grubości 0.5 mm zgodnie z instrukcją na zdjęciach
hold 3 pieces of copper wire in a vise or stick them together with adhesive tape and begin to weave wire ( 0.5 diameter) according to the instructions on the photos
zakręcamy ,okręcamy i dociskamy szczypcami
wrap and squeeze with pliers
teraz przystępujemy do etapu końcowego wystarczy już tylko ,pilnikiem do paznokci lub papierem ściernym zaokrąglić ostre brzegi drutu i zagiąć na kształt pierścionka na np. grubym markerze poprawiając szczypcami pokrytymi materiałem i gotowe !
now it's the final stage, with the help of sand paper or nail file round off the sharp edges of the wire and give it the round shape on for example thick marker with the help of pliers,
remember to cover the pliers with thick fabric or leather before you begin to work
A tak pierścionki prezentują się na mnie :-)
miedz jest przepiękna :-)
here is how ready rings look like
copper jewelry rules!
when you'll have your ring keep away from this guy -->
kiedy już zrobisz swój wymarzony pierścień trzymaj sie z daleka od tego gościa -->
Inne posty o miedzianej biżuterii: Different posts about copper jewelry:
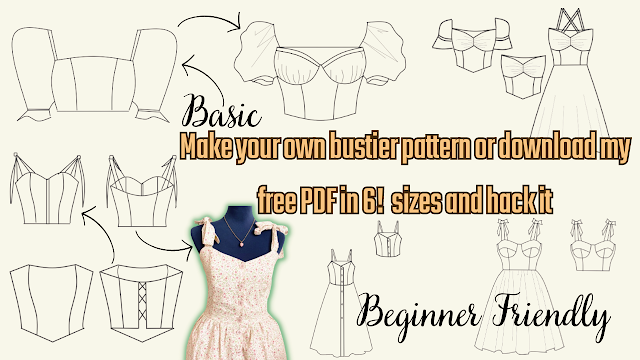
Are you ready to create your own bustier pattern? Look no further, because I've got you covered! In this tutorial, I will show you how to create your own basic bustier pattern or download my free printable PDF pattern in 6 sizes and hack it into 8 different styles, including a bustier with cups, milkmaid top, bustier with sleeves or without sleeves, bustier dress, and more. This tutorial is perfect for beginners, and I will guide you step-by-step on how to resize the pattern and add perfect sleeves. With this video, you can easily create your own custom-made bustier that fits you perfectly! But wait, there's more! Not only will you get access to my free PDF pattern, but you can also share it with your sewing friends. It's easy to download and print, and you can start creating your own bustier right away. So, don't hesitate to watch the whole video and start creating your own unique bustier pattern. And if you like this video, please give it a thumbs up and subscribe to ...
Looking for a quick and easy sewing project that's perfect for beginners? Look no further than my latest tutorial on how to sew a bralette top! This bralette top is made using fabric scraps, so it's not only budget-friendly, but also sustainable. Plus, I'm giving away a free printable PDF pattern that comes in all sizes, so you can easily make this top for yourself or as a gift for a friend. In my next post, I'll be sharing a video tutorial on how to use my free sewing PDF pattern, including how to resize it, hack it, and get creative with different variations. So make sure to subscribe to my channel and stay tuned for that! But for now, let's focus on making this super easy bralette top. My step-by-step tutorial includes detailed instructions and photos to guide you through every step of the process. And if you get stuck, don't worry - I'm always here to answer any questions you may have. So what are you waiting for? Download the free printable PDF patter...
Sewing a Backless Halter Top: An Easy and Eco-Friendly DIY Project Summer is around the corner, and what better way to prepare for the warm weather than by sewing your own backless halter top? This DIY project is perfect for beginners, as it's easy to make and requires only a few fabric scraps. In this tutorial, you will learn how to sew a stylish and comfortable backless halter top using your own measurements and a free printable PDF pattern. The pattern is designed to be adjustable, so you can customize it to your exact size. The best part of this project is that it's not only fun and easy, but it's also eco-friendly. You can use fabric scraps or old clothes that you no longer wear, and turn them into a beautiful and functional piece of clothing. To get started, you will need the following supplies: Fabric scraps or old clothes Ruler Scissors Sewing machine Pins Free printable PDF pattern (downloadable from the blog post) Step-by-Step Tutorial: Download and print the PDF ...
.heif)


.png)
.png)
Przepiękne! <3 Mi wire wrapping średnio idzie :(
ReplyDeletedzieki :-), nie przejmuj się tym i ćwicz dalej , gdybyś tylko widziałam moje pierwsze dzieła
DeletePięknie wyglądają!
ReplyDeletedziękuje ;-)
DeleteNiezwykle spleciony, swietny:)
ReplyDelete:-) dziękuje !
DeleteCudowny pierścionki! W rezultacie zaczynam rozglądać się już za miedzianymi drucikami, które moglabym wykorzystać. ;)
ReplyDeletesuper ! 3-mam kciuki :-) i pozdrawiam serdecznie
Delete