There’s something truly magical about lighting a candle you made with your own hands. Whether you're chasing a cozy atmosphere, a soothing scent to unwind, or just a fun DIY project, making candles at home is easier (and more satisfying) than you might think.
In this guide, I'll walk you through everything you need to know—from choosing the best wax (like soy, beeswax, or coconut) to crafting your very first candle step by step. I’ll also explore what makes a candle clean-burning, which wax is healthiest, and how to make your creations smell amazing.
So grab your favorite mug, settle in, and let’s get into the cozy world of candle DIY—because your home deserves that warm glow, and you deserve the joy of making it.
🕯️ Make Your Own Candle Wicks!
Don’t have store-bought wicks? No problem! Learn how to make eco-friendly, clean-burning candle wicks at home using things you already have.
Why Make Your Own Candles?
There are so many reasons to love DIY candle making:
- Creative control: Choose your own colors, fragrance oils, and container styles. From earthy patchouli blends to holiday-inspired spice, the possibilities are endless.
-
Budget-friendly: Making candles at home can be significantly cheaper than store-bought artisan candles—especially if you reuse jars or buy wax in bulk.
-
Sustainable: Use natural candles made with soy, rapeseed, or beeswax and reusable glass containers to reduce waste.
Plus, it's fun! Whether you're looking to make aromatherapy candles, get into crafting, or create custom gifts, candle making is the perfect creative hobby.
Types of Wax & Their Properties
Here’s how the most popular candle waxes compare in terms of sustainability, burn quality, health, and scent performance:
- Made from soybean oil.
- Eco-Factor: Renewable, biodegradable, and clean-burning.
- Burn: Slow and even with moderate scent throw.
-
Health: Generally low-soot and safe—just ensure it's non-GMO and pesticide-free.
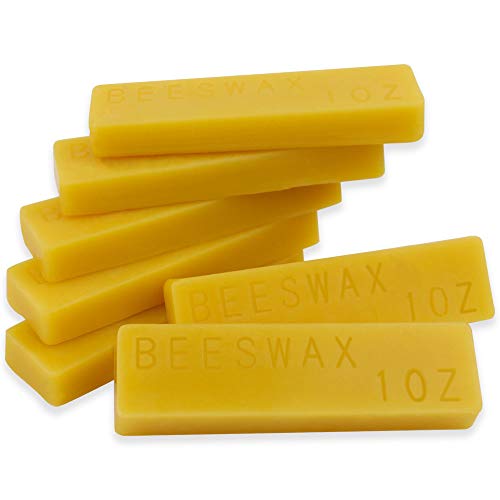
Beeswax
Natural Wonder:
- Produced by bees, with a subtle honey aroma.
- Burn Quality: Longest, cleanest burn—emits air-purifying negative ions, great for allergies.
-
Health: Hypoallergenic, soot-free.
-
Cons: Expensive and holds less fragrance than other waxes.
- Made from coconut oil; soft, creamy texture.
- Burn: Cleanest burn with excellent fragrance throw.
- Health: One of the healthiest waxes—non-toxic, low soot.
- Cons: Higher cost but worth it for quality.
- Petroleum byproduct, widely used commercially.
- Burn: Strong scent and color throw.
- Health: Produces soot and harmful emissions like benzene and toluene.
- Tip: Avoid if prioritizing clean indoor air.
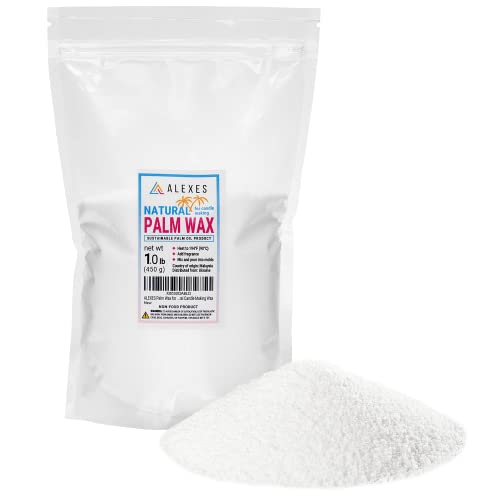
- Tropical plant-derived, creates crystallized surfaces.
- Burn: Hard and long-burning.
-
Cons: Risk of deforestation—only buy RSPO-certified palm wax.
- Grown mostly in Europe, plant-based and vegan.
- Burn: Clean, slow burn with neutral scent and great fragrance retention.
-
Health: Non-toxic and low carbon footprint.
Gel Wax
For Creativity:
- Made from mineral oil and resin; transparent and great for embedded designs (e.g., seashells).
- Burn: Long-lasting, but can overheat containers.
- Cons: Not biodegradable.
- Best of Both Worlds: Mixes combine the scent throw of paraffin or coconut with the eco-quality of soy or rapeseed.
-
Burn: More stable and customizable.
- Common Use: Widely used in commercial candles for consistent results.
Quick Wax Comparison Guide
| Wax Type |
Clean Burn |
Scent Throw |
Eco-Friendly |
Texture & Look |
Great For... |
| Soy |
✅✅ |
✅✅ |
✅✅✅ |
Smooth, creamy |
Everyday candles, beginners |
| Beeswax |
✅✅✅ |
✅ |
✅✅ |
Natural yellow, rustic |
Tapers, hypoallergenic candles |
| Coconut |
✅✅✅ |
✅✅✅ |
✅✅✅ |
Soft, white & luxe |
High-end, clean-burning candles |
| Paraffin |
❌ |
✅✅✅ |
❌ |
Glossy, holds color well |
Bold colors/scents, low-budget |
| Palm |
✅✅ |
✅✅ |
⚠️ Depends |
Crystallized, textured |
Decorative pillar candles |
| Rapeseed |
✅✅✅ |
✅✅ |
✅✅✅ |
Soft, pale, creamy |
Vegan, EU-based candle makers |
| Gel |
❌ |
✅✅ |
❌ |
Clear & jelly-like |
Embedded designs, novelty candles |
| Blends |
✅✅ |
✅✅✅ |
✅✅ (varies) |
Customizable |
Balancing scent & clean burning |
🕯️ Tip: If you want the healthiest candles, coconut wax or beeswax are top picks!
Best Wax for Your Needs
| Goal |
Recommended Wax(es) |
| Cleanest, healthiest burn |
Coconut, Beeswax |
| Vegan & eco-conscious |
Soy, Coconut, Rapeseed |
| Strong scent throw |
Paraffin, Coconut blends |
| Unique textures |
Palm wax (ethically sourced) |
| Creative designs (e.g., embeds) |
Gel wax |
| Budget-friendly candles |
Soy, Paraffin blends |
Beeswax is best for air purification and allergy relief, while coconut wax is the cleanest-burning and most luxurious. Avoid paraffin if you're concerned about toxins and indoor air quality.
Step-by-Step Candle DIY Tutorial
Step 1: Gather Your Supplies
Step 2: Prepare the Container & Wick
- Attach your wick to the center using a glue dot or wax ( or look on photos). Use a wick centering tool to keep it upright.
Tip: Wick size depends on the wax type and container diameter. Thicker waxes like beeswax may need larger wicks.
Step 3: Melt the Wax
Use a double boiler to gently melt your wax:
-
Soy: ~65°C (149°F)
- Coconut: ~75°C (167°F)
-
Paraffin: 85-95°C (185-203°F)
Avoid direct heat to prevent scorching and fumes. Stir gently.
Step 4: Add Color & Fragrance
- Let wax cool slightly (about 60–65°C) before adding fragrance oil.
- Stir for 2 minutes to blend evenly.
Step 5: Pour the Wax
- Pour slowly into the container.
- Keep the wick centered and steady.
- Tip: Use heat-resistant jars for gel wax to prevent cracking.
Step 6: Cure & Trim
- Let the candle sit undisturbed for 24 hours.
- Trim the wick to 5 mm before lighting.
Fix tip: If sinkholes form, top off after 4–6 hours with a bit of melted wax.
Step 7: Burn Test
- Light the candle for 2–3 hours to form an even melt pool.
- Trim wick before each use to avoid smoke and mushrooming.
Health & Environmental Insights
Not all candles are created equal:
- Health: Beeswax emits purifying ions and burns ultra-clean. Coconut wax is also top-tier for air quality. Soy is fairly clean. Paraffin releases soot and possible toxins.
- Eco-impact: Soy, coconut, and rapeseed are sustainable. Palm wax can be eco-friendly only if certified. Paraffin and gel waxes are petroleum-based and non-biodegradable.
- Fragrance throw: Paraffin and coconut wax (or their blends) provide the strongest scent diffusion. Beeswax is more subtle.
.jpeg)
How to Melt and Pour Different Wax Types
Each wax type requires different handling:
- Soy wax melts at ~65°C and cools quickly. Great for beginners.
- Coconut wax melts at ~75°C and gives a rich, creamy texture—ideal for luxury candles.
-
Paraffin wax needs higher heat (85–95°C) and offers strong scent throw, but should be avoided if you’re sensitive to synthetic fragrances.
- Beeswax is dense and slow-melting; it works beautifully for tapered or pillar candles.
- Gel wax needs a clear, heatproof container and is great for adding visual elements like glitter, flowers, or shells. It doesn't fully harden, so avoid overfilling or storing in sunlight.
Melting & Pouring Temperatures
| Wax Type |
Melt Temp (°C) |
Add Fragrance Temp (°C) |
Pour Temp (°C) |
| Soy |
65 °C |
60–65 °C |
55–60 °C |
| Beeswax |
62–65 °C |
Add early |
60 °C |
| Coconut |
75 °C |
65 °C |
60–65 °C |
| Paraffin |
85–95 °C |
75–80 °C |
70–75 °C |
| Palm |
80–85 °C |
70–75 °C |
65–70 °C |
| Rapeseed |
65–70 °C |
60–65 °C |
60 °C |
| Gel |
95–105 °C |
70–75 °C (light scent) |
55–60 °C |
| Blends |
Varies |
Depends on base waxes |
Varies |
💡 Always use a thermometer! Overheating wax can ruin the scent and cause safety issues.
.jpeg)
✨ Love DIY Self-Care?
Learn how to make soothing bath salts without Epsom salt using natural ingredients you already have at home!
🌿 Try the DIY Bath Salts Recipe
Candle DIY so Simple !
And just like that—you've got yourself a handcrafted candle! Whether you went for the clean burn of coconut wax, the natural charm of beeswax, or played around with fun gel wax designs, you've done something creative, cozy, and totally personal.
 |
| Save it for Later ! | |
Don't worry if your first candle isn't perfect (they rarely are!). Each pour teaches you something new, and before long, you'll be experimenting with layered scents, color swirls, and seasonal blends.
If you loved this guide, be sure to save it for your next DIY day, share your candle creations with me using #anielskaanieladiy, or leave a comment with your favorite scent combo—I’d love to hear from you!
Here’s to warm light, good scents, and the joy of crafting something beautiful. 🕯️✨
This post has affiliate links * Affiliate Link. This means that if you
click on the link and purchase an item, I will receive a small
percentage of your purchase (at no extra cost to you)
.heif)
.jpeg)
.jpeg)
.jpeg)





.jpeg)
.jpeg)
.jpeg)
.jpeg)
.jpeg)
.jpeg)
.jpeg)
.jpeg)
.jpeg)
.jpeg)
.jpeg)
.jpeg)
.jpeg)
.jpeg)
.jpeg)
.jpeg)
.jpeg)
.jpeg)
.jpeg)
.jpeg)
.jpeg)

.png)
.png)
Comments
Post a Comment
Hello !