Dust lightly with a puff after your shower — this DIY body powder leaves skin soft, fresh, and beautifully scented. There’s something wonderfully timeless about a soft puff of perfumed body powder . It’s more subtle than perfume, keeps skin silky, and carries a personal, intimate scent that lingers close to you. Best of all, you don’t need talc or complicated ingredients — you can make a talc-free body powder at home in minutes. In this guide, you’ll get: A from-scratch body dusting powder recipe (completely homemade) A baby powder upgrade recipe (transform a base you already have) 15+ scent blends you will love (from floral to cozy to citrus fresh) Pro tips on how to use, why to use, and how to make it silky and safe Why Use Perfuming Body Powder? Many people ask why bother with DIY perfumed body powder when sprays and perfumes exist. Here’s why: Soft, intimate fragrance : a veil of scent that stays close to skin Absorbs light moisture : perfect for...
Get link
Facebook
X
Pinterest
Email
Other Apps
ice Dyed Fabric / barwienie kostkami lodu
Get link
Facebook
X
Pinterest
Email
Other Apps
If you liked my previous winter experiment,you'll be happy that here comes second part of it ! Today we will test ice cubes dyeing ⛄.
Ice cubes are great don't you think?, you can make with it ''martini shaken not stirred'' 🍸 like James Bond
or you just can dye your favourite t-shirt 👕.
Here little present from me to you ❤ recipe for famous Bond's drink
INGREDIENTS 🍸
3oz vodka
A small amount (capful) of dry vermouth
Lemon peel
METHOD 👈
Shake all the ingredients with ice in a shaker, then pour into a chilled martini glass or a champagne goblet. Add a lemon twist.
Kostki lodu są fantastyczne czyż nie , można dodać je do martini ''zmieszanej nie wstrząśniętej'' jak James Bond 💪
Lub po prostu zabarwić nimi swój ulubiony t-shirt 👕
Od mnie dla Was 💗
Przepis na ulubiony drink Jamesa Bonda
Jak zrobić drink martini ala James Bond? SKŁADNIKI 🍸
3 uncje wódki
Niewielka ilość (nakrętka) suchego wermutu
Skórka cytryny
METODA 👈
Wstrząsnąć wszystkie składniki z lodem w shakerze, a następnie wlać do schłodzonej szklanki martini lub kieliszka do szampana. Dodaj odrobinę ''zakręconej skórki''
( kurcze nie wiem jak to się nazywa w języku barmanów) cytryny
w każdym razie tego 😉👇
Pij do dna 😄
dyeing fabrics and clothes with ice cubes
barwienie ubrania i materiału kostkami lodu
What do you need to dye fabrics and clothes with ice cubes:
Do zabarwienia ubrań i materiału potrzebujesz:
koszyk plastikowy/ plastic basket
miskę / bowl
kostki lodu / ice cubes ⛄
barwniki do ubrań / dyes
gumki ,klamerki (opcjonalnie do uformowania wzorów na materiale) / clips , elastics
( it's optional, but you can form different designs on clothes )
rękawiczki lateksowe / latex gloves
kubek / cup
Prepare the fabric for dyeing
and form it according to your liking
Przygotuj materiał
uformuj materiał wedle gustu
How to dye fabrics or/ and clothes with ice cubes ? 🏂
Jak zabarwić ubranie lub materiał kostkami lodu ?
First step ( optional)
Add 2 spoon of salt to water and mix it
before dyeing wet the fabric in this water for 10 min. next squeeze excess water
przed barwieniem zamocz materiał w wodzie na 10 min. i odciśnij nadmiar wody
opcjonalnie możesz pominąć ten krok
do ciepłej wody dodaj łyżeczkę soli i wymieszaj ją do całkowitego rozpuszczenia w wodzie
1. prepare basket, ice cubes, bowl and fabric
2. put a piece of fabric on a botton of basket ( it's optional part )
3. put a basket into bowl
4. lay wet fabric on a basket
5. next place ice cubes on it
6. sprinkle ice cubes with dyes in powder 🌈
1.przygotuj koszyk , kostki lodu , miskę i materiał
2.na dno miski połóż kawałek materiału (opcjonalnie)
3.do miski włóż koszyk
4.na koszyk połóż wcześniej zamoczony w wodzie materiał
5.na materiale poukładaj kostki lodu
6.kostki lodu posyp farbami w proszku (wedle gustu)
How to preserve the dye color ?
Jak utrwalić kolor barwnika?
if you didn't add salt
, wash out the fabric in a water with 1 spoon of vinegar
jeżeli do wody nie dodałaś/eś soli wypłucz materiał w czystej wodzie z łyżeczką octu
The effects of ice cube dyeing :
Efekt barwienia kostkami lodu:
Again same mistace, I used wrong fabric LOL
to justify myself : I did it in same time I did dyeing with snow 💀
conclusion
it should be natural fabrics and with out patterns ❗
tak , ten sam błąd ponownie LOL , ale wykonywałam te eksperymenty w tym samym czasie więc chyba jestem usprawiedliwiona 👀
wniosek
do barwienia idealnie nadają się materiały naturalne i bez wzorów 😘
and here you can see wow effect 😤
Koszula męska zabarwiona kostkami lodu trzeba przyznać, że tutaj jest efekt wow 💃
compared to snow dyeing dye with ice cubes penetrates the fabric much better and you can see same pattern in front and back of fabric 👈
w porównaniu do śniegu barwnik rozprowadzany kostkami lodu przenika lepiej przez materiał i można podziwiać prawie identyczny wzór z przodu i z tyłu koszuli 👈
on linen fabric
PS. linen is perfect for dyeing
i na kawałku lnu
PS. len idealnie nadaje się do barwienia
Differences between ice cubes dyeing and snow dyeing ❕:
They look smilar but dyeing with ice cubes gives more intensive patterns
when dyeing with snow makes patterns and colors look hazy
Różnice pomiędzy barwieniem śniegiem i kostkami lodu ✔:
Barwienie kostkami lodu daje zbliżone efekty do barwienia śniegiem choć trzeba przyznać, że są lekkie różnice w rozprowadzeniu barwnika na materiale
👉barwnik rozprowadzany -kostkami lodu daje ostrzejsze wzory
👉barwnik rozprowadzany- śniegiem daje wzory lekko rozpływające się mgliste
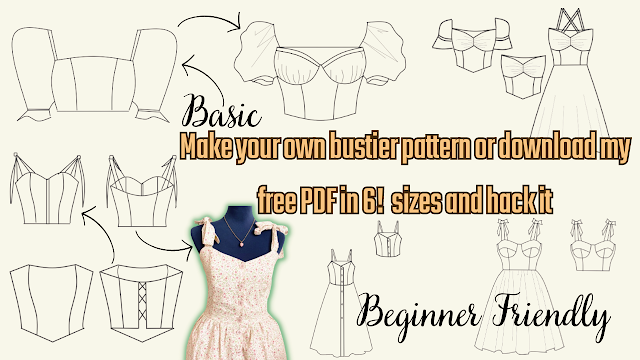
Are you ready to create your own bustier pattern? Look no further, because I've got you covered! In this tutorial, I will show you how to create your own basic bustier pattern or download my free printable PDF pattern in 6 sizes and hack it into 8 different styles, including a bustier with cups, milkmaid top, bustier with sleeves or without sleeves, bustier dress, and more. This tutorial is perfect for beginners, and I will guide you step-by-step on how to resize the pattern and add perfect sleeves. With this video, you can easily create your own custom-made bustier that fits you perfectly! But wait, there's more! Not only will you get access to my free PDF pattern, but you can also share it with your sewing friends. It's easy to download and print, and you can start creating your own bustier right away. So, don't hesitate to watch the whole video and start creating your own unique bustier pattern. And if you like this video, please give it a thumbs up and subscribe to ...
Looking for a quick and easy sewing project that's perfect for beginners? Look no further than my latest tutorial on how to sew a bralette top! This bralette top is made using fabric scraps, so it's not only budget-friendly, but also sustainable. Plus, I'm giving away a free printable PDF pattern that comes in all sizes, so you can easily make this top for yourself or as a gift for a friend. In my next post, I'll be sharing a video tutorial on how to use my free sewing PDF pattern, including how to resize it, hack it, and get creative with different variations. So make sure to subscribe to my channel and stay tuned for that! But for now, let's focus on making this super easy bralette top. My step-by-step tutorial includes detailed instructions and photos to guide you through every step of the process. And if you get stuck, don't worry - I'm always here to answer any questions you may have. So what are you waiting for? Download the free printable PDF patter...
Sewing a Backless Halter Top: An Easy and Eco-Friendly DIY Project Summer is around the corner, and what better way to prepare for the warm weather than by sewing your own backless halter top? This DIY project is perfect for beginners, as it's easy to make and requires only a few fabric scraps. In this tutorial, you will learn how to sew a stylish and comfortable backless halter top using your own measurements and a free printable PDF pattern. The pattern is designed to be adjustable, so you can customize it to your exact size. The best part of this project is that it's not only fun and easy, but it's also eco-friendly. You can use fabric scraps or old clothes that you no longer wear, and turn them into a beautiful and functional piece of clothing. To get started, you will need the following supplies: Fabric scraps or old clothes Ruler Scissors Sewing machine Pins Free printable PDF pattern (downloadable from the blog post) Step-by-Step Tutorial: Download and print the PDF ...
.heif)


.png)
.png)
Love the post dear!
ReplyDeleteHave a great day!
xoxo
http://badassvampire.blogspot.rs/
thank you! same for you :-)
DeleteFajny, taki artystyczny efekt ;)
ReplyDeleteco nie ;-)
Deletesnow, ice ?!! It's so different. It's like magic ! I'm in love with the shirt !!! whaou !
ReplyDeleteXOXO
thank you! xoxo
Delete