Dust lightly with a puff after your shower — this DIY body powder leaves skin soft, fresh, and beautifully scented. There’s something wonderfully timeless about a soft puff of perfumed body powder . It’s more subtle than perfume, keeps skin silky, and carries a personal, intimate scent that lingers close to you. Best of all, you don’t need talc or complicated ingredients — you can make a talc-free body powder at home in minutes. In this guide, you’ll get: A from-scratch body dusting powder recipe (completely homemade) A baby powder upgrade recipe (transform a base you already have) 15+ scent blends you will love (from floral to cozy to citrus fresh) Pro tips on how to use, why to use, and how to make it silky and safe Why Use Perfuming Body Powder? Many people ask why bother with DIY perfumed body powder when sprays and perfumes exist. Here’s why: Soft, intimate fragrance : a veil of scent that stays close to skin Absorbs light moisture : perfect for...
Get link
Facebook
X
Pinterest
Email
Other Apps
Full circle skirt / jak uszyć spódniczkę z koła
Get link
Facebook
X
Pinterest
Email
Other Apps
Circle skirts are very popular for few past years! and it doesn't surprise me, they look ... lovely and are really easy to make ,I made mine from cotton sheet.
If you are fond of flared skirts , you will love this tutorial.
Ten typ spódniczki w ostatnich latach (tak latach!) jest szalenie modny wystarczy spojrzeć na portale modowe
,nazywa się ją :skater skirt,z pełnego klosza,rozkloszowana,kulista itd.
A więc nie zwlekaj lato jest już tuż tuż, jeżeli i Ty chcesz zaopatrzyć swoją szafę w tą szalenie modną spódniczkę to tutorial dla Ciebie ,
wymierzamy talię i 1/4 naszego obwodu zaznaczamy na rogu materiału,możesz pomóc sobie przykładając dodatkowo np. talerz(ten sposób jest dla wszystkich którzy nie lubią "skomplikowanych" obliczeń;))
measure your waist and mark 1/4 of your circuit on edge of the fabric,
you can help yourself with a plate
następnie z pomocą linijki lub miarki krawieckiej ,wyznaczamy długość spódniczki ,patrz foto
next with the help of the ruler or tailor's measure you need to define length of your skirt ,
look at the photo
nasz wykrój powinien wyglądać tak
your pattern should look like this
wycinamy,pamiętaj talię wycinamy nad naszą linią
now you cut out your pattern, remember to cut above the waist line
nacinamy po środku,przymierzamy czy pasuje w talii ,tutaj jeszcze możemy wszystko naprawić,poszerzyć lub zwęzić
next you need to cut in the middle, now you should try on your '' almost ready'' skirt, it's the best time to check it all, you can still correct your mistakes ! for example you can make it wider or slimer
podwijamy brzegi szwu na zamek i podszywamy zygzakiem następnie zszywamy je razem
now you need to take care about zipper
roll up seam edges and make zig zag stitch next sew them together ,
look at the photo
rozprasowujemy
iron out
wyznaczamy miejsce na zamek
mark the place for zipper
teraz nasza talia ,wycinamy według naszych wymiarów plus pół do 2 cm na podwinięcie ,patrz foto
now our waist
cut out your waist according to your measures plus 0,5 or 2 cm for seam
składamy w pół prasujemy (jeśli materiał jest zbyt miękki wewnątrz pasa przeprasuj kawałek fizeliny, to usztywni pas :))
fold in half and iron out , if the fabric is too soft you need to add interlining
talię i zamek przypinamy szpilkami do spódniczki ,następnie zszywamy
now you need to attach your waist and zipper with pins to skirt and sew
Przed podszyciem spódniczki odwieś ją na 24 h ,po tym czasie uwydatnią się ewentualne krzywizny i nierówności :)
jest kilka sposobów wykończenia dołu spódniczki
1.lamówka
2.stópką podwijającą
3.tasiemką (przyszycie szew prosty)
4. zygzak drobny
5.podwinięcie i zygzak
i ten ostatni według mnie najprostszy sposób użyłam ja
Before finishing up raw edges , leave the skirt on hanger for 24 hours , after that time all curvature will appear and it will be easy to fix it.
tył
i przód
Pamiętaj wszystko przeprasować i spódniczka gotowa
remember to iron out all and skirt is ready ^^
Spódnica z koła Po szyciu
teraz jesteś w posiadaniu szalenie modnej spódniczki!
nie ograniczaj się, możesz ją uszyć w wielu innych długościach lub zmieniać kształt talii
you can sew this skirt in many other ways , change length of it or shape of your waist
Gotowa spódniczka półkola
dodatkowo w podobny sposób uszyjesz spódniczkę z pół koła
in similar way you can sew skirt from half circle
here's how it looks
na pewno pokaże jeszcze inny sposoby na uszycie spódniczki koło ,szycie jej to świetna zabawa :)
Stylizacja z spódniczką
ten dół spódniczki możesz doszywać np. do żakietu,płaszcza lub do bluzki i uszyjesz odjazdową sukienkę
Więcej tutoriali na odjazdowe spódniczki i spodenki wkrótce :)
Hi! I am Portuguese and I think your tutorial looks very simple to follow, but the translation to Portuguese is very poor... :( So, could you put also in English???? It would make it so much easy to follow! Thank you! Kisses from Portugal!
Jest naprawde śliczna zaraz gdy zobaczyłam twój tutorial zabrałam sie do szycia bardzo ładnie umiesz to wytłumaczyć wczrśniej nie za bardzo wiedziałam jak taką uszyć ale teraz już nie mam problemu dzięki tobie: ) bardzo dziękuje
Kroczek za kroczkiem i będziesz śmigała ! Wierz mi, ja też byłam na początku zielona jak trawa na wiosne, a i w domu nie mam żadnych krawców. 3mam kciuki :-)
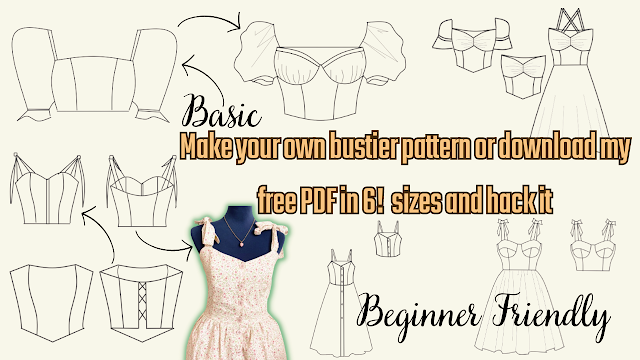
Are you ready to create your own bustier pattern? Look no further, because I've got you covered! In this tutorial, I will show you how to create your own basic bustier pattern or download my free printable PDF pattern in 6 sizes and hack it into 8 different styles, including a bustier with cups, milkmaid top, bustier with sleeves or without sleeves, bustier dress, and more. This tutorial is perfect for beginners, and I will guide you step-by-step on how to resize the pattern and add perfect sleeves. With this video, you can easily create your own custom-made bustier that fits you perfectly! But wait, there's more! Not only will you get access to my free PDF pattern, but you can also share it with your sewing friends. It's easy to download and print, and you can start creating your own bustier right away. So, don't hesitate to watch the whole video and start creating your own unique bustier pattern. And if you like this video, please give it a thumbs up and subscribe to ...
Looking for a quick and easy sewing project that's perfect for beginners? Look no further than my latest tutorial on how to sew a bralette top! This bralette top is made using fabric scraps, so it's not only budget-friendly, but also sustainable. Plus, I'm giving away a free printable PDF pattern that comes in all sizes, so you can easily make this top for yourself or as a gift for a friend. In my next post, I'll be sharing a video tutorial on how to use my free sewing PDF pattern, including how to resize it, hack it, and get creative with different variations. So make sure to subscribe to my channel and stay tuned for that! But for now, let's focus on making this super easy bralette top. My step-by-step tutorial includes detailed instructions and photos to guide you through every step of the process. And if you get stuck, don't worry - I'm always here to answer any questions you may have. So what are you waiting for? Download the free printable PDF patter...
Sewing a Backless Halter Top: An Easy and Eco-Friendly DIY Project Summer is around the corner, and what better way to prepare for the warm weather than by sewing your own backless halter top? This DIY project is perfect for beginners, as it's easy to make and requires only a few fabric scraps. In this tutorial, you will learn how to sew a stylish and comfortable backless halter top using your own measurements and a free printable PDF pattern. The pattern is designed to be adjustable, so you can customize it to your exact size. The best part of this project is that it's not only fun and easy, but it's also eco-friendly. You can use fabric scraps or old clothes that you no longer wear, and turn them into a beautiful and functional piece of clothing. To get started, you will need the following supplies: Fabric scraps or old clothes Ruler Scissors Sewing machine Pins Free printable PDF pattern (downloadable from the blog post) Step-by-Step Tutorial: Download and print the PDF ...
.heif)


.png)
.png)
Dodałabym, że taka spódnica przed szyciem powinna się "odwisieć". Materiał cięty po skosie ma tendencje do wyciągania się, co grozi ogonami ;)
ReplyDeleteHi!
ReplyDeleteI am Portuguese and I think your tutorial looks very simple to follow, but the translation to Portuguese is very poor... :(
So, could you put also in English???? It would make it so much easy to follow!
Thank you!
Kisses from Portugal!
Hello!
DeleteThank you for lovely comment ^^
sure, I will do it as soon as possible
Hugs from Poland!
Wyszła świetnie i bardzo ładny materiał szkoda tylko, że nie umiem szyć nawet z tak dokładną instrukcją
ReplyDeleteNajtrudniej jest zrobić pierwszy krok, spróbuj , może wyjść lepiej niż przypuszczasz, 3-mam kciuki!
DeleteJest naprawde śliczna zaraz gdy zobaczyłam twój tutorial zabrałam sie do szycia bardzo ładnie umiesz to wytłumaczyć wczrśniej nie za bardzo wiedziałam jak taką uszyć ale teraz już nie mam problemu dzięki tobie: ) bardzo dziękuje
ReplyDeleteSuper , że pomogłam !
DeleteSzukałam takiej spódnicy, ale dzięki Twojemu tutkowi spróbuję uszyć sama ;) Dzięki!
ReplyDeleteI tak trzymać ! ,jak raz uszyjesz swoją to już żadnej nie kupisz ,tylko będziesz sobie szyć :)
Deletewycięłam krój z materiału i odwiesiłam na 24h, jak radzisz, zobaczymy jak mi wyjdzie efekt końcowy, bo szyć to ja nie umiem :D
ReplyDeleteKroczek za kroczkiem i będziesz śmigała !
DeleteWierz mi, ja też byłam na początku zielona jak trawa na wiosne, a i w domu nie mam żadnych krawców.
3mam kciuki :-)